Showing posts with label Vegetables /Dry/Fry. Show all posts

Friday, February 28, 2014

Broccoli Rabe / Rapini Poriyal


Ingredients:

         Broccoli Rabe        -  1 Bunch (Cleaned and Chopped)
         Onion                   -   1 Chopped
         Red Chili               -  2  Broken
         Mustard Seeds      - 1 tsp
         Urad Dal               - 1 tsp
         Cumin Seeds         - 1/2 tsp
         Grated Coconut     - 2 tbs
         Hing                     - 1/4  tsp
         Curry Leaves
         Salt

Method :
                  Coarsely grind cumin and coconut . Heat oil in a pan. Add mustard seeds and urad dal. Once the mustard seeds crackle, add broken red chili , curry leaves, hing and then onion. Once the onion becomes soft , add the chopped greens and salt. Let it cook till the greens become tender. Add cumin-coconut mix to the greens. Cook for a minute or two and switch off the flame.
       

Monday, July 9, 2012

Broccoli Parupu Usili


 Same receipe as Kaaramani Parupu usili


Ingredients

Broccoli       - 1 bunch including the stem  (2-3 cups chopped)
Channa dhal - 1/2 cup or
             mixed dhal (channa: toor) soaked
Chili Powder - 1 tsp
Red Chili       - 2
Turmeric        - 1/4 tsp
Salt

To Temper

Mustard seeds - 1/2 tsp
Urad Dhal        - 1 tsp
Broken  Chili   - 1
Hing                - 1/2 tsp
Curry Leaves   - few
  
 Method

        Chop the Broccoli into tiny florets. Briefly drop them in boiling water and fish it out. Coarsely grind channa dhal and red chili with little salt. Microwave the ground mixture for 1-2 minutes or steam it in idli cooker. Once it cools down, give few pulses in the mixer to crumble. Add turmeric and salt to the florets and cook till it become tender. Take oil in a pan and temper mustard seeds, urad dhal, hing, broken chili and curry leaves. Add cooked broccoli to the pan and give a nice stir. Finally add the crumbled dhal and chili powder. Toss it well and cook in simmer for few more minutes. Serve hot with rice and sambar.


Sweet Potato Fries


  Sweet Potato also called as Yam in some parts of US does not belong to the Yam family. It’s one of the Top10 Superfoods and high in Potassium (higher content than a Banana), Beta Carotene and Vitamin A.
Sweet Potato is a part of our regular diet. I simply microwave the sweet potato or bake it in the oven. Just for a change, I made it like finger fries that can be eaten with rice or as a snack. 

Ingredients:

    Sweet Potato - 2
    Chili powder - 1 tsp
    Coriander powder - 1/4 tsp

Seasoning:-
    Mustard seeds - 1/2 tsp
    Cumin seeds    - 1/2 tsp
    Curry Leaves   - few
    Broken Chili    - 1
    Hing
    Salt

Method:
            
              Peel and cut the sweet potato lengthwise (2"). Briefly boil the potatoes in salted boiling water and drain it. Keep oil in a pan. Add the seasoning ingredients. Once the seeds splutter, add the parboiled potatoes, chili powder, Coriander powder, hing and salt. Toss it gently and cook the potatoes for few minutes.

Monday, May 7, 2012

Swiss Chard Poriyal


Swiss Chard Poriyal

Ingredients:

         Swiss Chard       -  1 Bunch (Cleaned & Chopped)
         Onion                 -  1 Chopped
         Red Chili            -  2  Broken
         Hing                   - 1/4  tsp
         Mustard Seeds   - 1 tsp
         Urad Dal            - 1 tsp
         Curry Leaves      - few
         Grated Coconut  - 2 tbs
         Salt

Method :
                   Heat oil in a pan. Add Mustard seeds and Urad Dal. Once the mustard seeds crackle, add broken red chili , curry leaves , hing and onion. Once the onion is cooked, add the chopped greens and salt. Let it cook till the greens become tender. Garnish with grated coconut.
                   Serve with Rice , Sambar and Papad.


Thursday, February 9, 2012

Kaaramani (Yard long Bean/Chori) Parupu Usili


Ingredients

Yard long Beans - 1 bunch (2-3 cups chopped)
Channa dhal - 1/2 cup or mixed dhals(channa:toor)soaked
Red Chili - 2
Turmeric - 1/4 tsp
Salt

To Temper

Mustard seeds - 1/2 tsp
Urad Dhal - 1 tsp
Broken Red Chili - 1
Hing - 1/2 tsp
Curry Leaves - few


Method
Coarsely grind channa dhal and red chili with little salt. Microwave the ground mixture for 1-2 minutes or you can steam it in idli cooker. Once it cools down, give few pulses in the mixer to crumble. Add turmeric and salt to the beans and cook with sprinkles of water and keep it aside. Take oil in a pan and temper mustard seeds, urad dhal, hing and curry leaves. Add cooked beans to the pan and give a nice stir. Finally add the crumbled dhal , stir well and cook in simmer for few minutes.

Serve with hot rice and sambar.


Monday, February 6, 2012

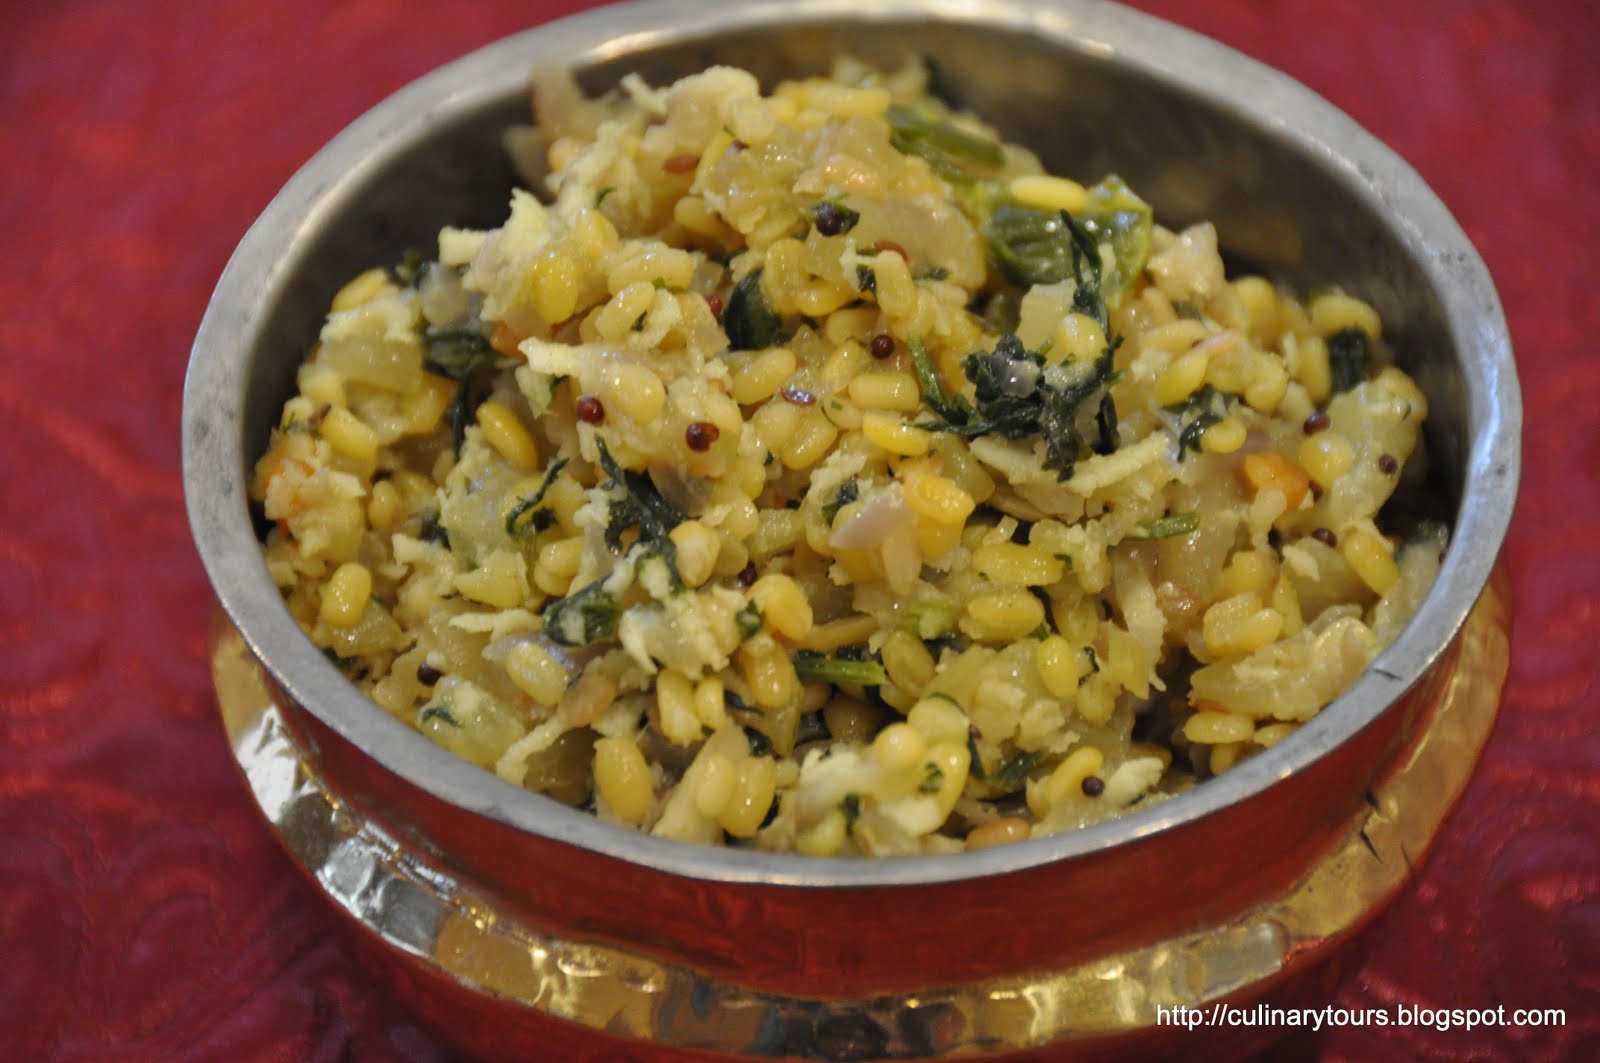
Bottle Gourd- Yellow Moong Stir Fry ( Sorakai Payatham Parupu Poriyal)


I tasted this dish at my friend's place and since then, I am hooked. It's very simple to make if you omit the methi.

Ingredients

Bottle Gourd - 1 (medium size- makes about 2-1/2 cups)
Yellow Moong Dhal- 1/2 cup (soaked in water for 1/2 hr)
Green Chili - 3-4(Slit Lengthwise)
Methi Leaves - 1 Bunch (optional)- Triple cleaned and chopped
Coconut - 3 tbs
Onion - 1 Chopped
Salt
Mustard Seeds
Curry Leaves
Hing
Oil


Method :-


First parboiled the moong beans and keep it aside. Heat oil in a pan and temper mustard seeds, cumin, curry leaves and hing. Add the slit green chilies, chopped onions and sauté it for a minute. Add the diced bottle gourd pieces to the pan. Cover and cook till the vegetable is half done. Sprinkle water if necessary. Add parboiled moong, turmeric, chopped methi and salt. Cook for few more minutes. Add freshly grated coconut to the vegetables and give a nice stir. Switch off the heat and serve.

Tuesday, December 14, 2010

Vazhaipoo Poriyal ( Banana Flower stir fry)


Banana flower is considered a very common vegetable in South India, especially in Tamilnadu state. It has lot of nutritional values and it is used in treating bronchitis, stomach ulcers, diabetes and menstrual problems. It also increases hemoglobin cell levels in the blood.


~Banana Blossom

We use almost all parts of the Banana tree. We use the tender innermost banana trunk (Vazhaithandu), Banana, Banana flowers ( Vazhaipoo) in cooking. We serve food in banana leaves (Vazhai Elai). The fiber ( Vazhai Naaru) from the outermost trunk of the banana tree is used as strings to tie fresh flowers and garlands.

Banana plant grows from under ground stem called rhizome. After the plant bore fruits, the plant dies and another stem emerges from under ground as a new plant and this process goes on and on for years. That’s why elders bless anyone with the saying “Vazhayadi Vazhaiyaha Vazha Vazhthukkal”, meaning live long like a banana tree.


Though cooking banana blossom is a tedious process, the end result is a very tasty and nutritious one. First remove the purple outer cover called bracts and take out the strip of flowers (tiny immature bananas) inside.


Keep on removing the bracts until the tough ones are removed. I usually remove till the tip of the flower (very tender cream bract) is seen.

Also remove string in the middle that looks like matchstick with a white tip and a rubbery skin with the pink hue. Remove both from each floret.


~The bottom two should be removed as shown


Whenever my mom worked on banana flowers, I and my sister would patiently wait till my mom came to the last part of peeling to get the tender most part of the blossom that can be eaten raw.


Ingredients:

Banana Blossom - 1
Red chili - 3
Mustard Seeds - 1tsp
Urad Dhal - 1 tsp
Turmeric - 1/4 tsp
Hing - 1/4 tsp
Curry Leaves - 1 sprig
Grated Coconut - 4 tbs
Salt

Method:

Chop the florets into tiny pieces. Place the chopped banana blossoms fully immersed in a bowl of buttermilk to prevent oxidization when exposed to air.


Pour oil in a kadai and add mustard seeds. Once the mustard seeds splutter, add urad dhal, red chili, hing and curry leaves. Add turmeric to the chopped florets and return the florets to the kadai and give a nice stir. Add salt and cover the pan with the lid. Cook until the florets become soft and tender. Add freshly grated coconut and mix well.

Serve with hot rice and sambar.


Notes:

Wear a glove when you work with banana blossoms to prevent the sap from sticking on to your hands. You can also add few tablespoons of boiled toor dhal (My mom usually adds it- may be to neutralize the bitterness?) along with the coconut.

Sunday, May 2, 2010

Beetroot Poriyal


Harvested Fresh from my garden


Tender Beet Leaves


Saturday, April 24, 2010

Saturday, April 4, 2009

Crispy Bitter Gourd Chips/Paavakaai Chips


Bitter Gourd? Yuck! I heard many people saying that . I admit that Bitter Gourd A.K.A Bitter Melon has an acquired taste. I liked it when I was young. As I grew older, I started loving it for its health benefits. Bitter Gourd is a must item in my weekly vegetable shopping list. Considering the health benefits (twice the calcium of spinach, twice the potassium of banana) that it provides one should consume at least once a week. It also helps to regulate Blood Sugar levels naturally.

My son likes it if I make Chips. (Tastes like crispy bitter pokoda). He loves to eat them with Yogurt rice.

Ingredients

Bitter gourd – 8 or 9 medium
Sambar Powder
Or Chili powder - 1 tsp
Fresh Lemon Juice -1tbs
Besan or Chick Pea flour – 4 to 5 tbs
Salt

Method:

Slice the Bitter gourd into thin rounds. Add Sambar powder or Chili powder, turmeric powder, lemon juice and salt to the bitter gourd and mix well. Let it sit for 10 minutes. Squeeze out the extra water from the vegetable. Then place it on a wide plate and sprinkle besan flour on top of the seasoned bitter gourd rounds. Adjust salt if needed. Deep fry in medium to low flame until it is crisp and slightly golden.

Friday, June 20, 2008

Jicama with Home grown Dill


Ingredients

Jicama - 1 cup cubed
Dill - a small bunch
Chili powder - 1tsp
Mustard seeds- 1/2 tsp
Cumin seeds - 1/2 tsp (optional)
Salt


Method.

Microwave Jicama pieces for 5 minutes. Wash and chop the Dill weeds. Take a teaspoon of oil in a kadai, add the mustard seeds. Once the mustard seeds start to splutter, add Jicama pieces, turmeric, Chili and salt . Give a nice toss. Add the chopped dill weeds and cook for few more minutes.

Serve with roti and daal.


Verdict:
--------
Mr. B and Junior B enjoyed like a snack. I and my sister preferred the salad over this.

Sunday, May 4, 2008

Vazhakai (Plantain) Puttu

This is a typical Tirunelveli recipe.

Ingredients

Raw Plantain - 3 (Choose Naatu Vazhakai)
Onion - 1
Green Chilies - 5-6
Freshly Grated
Coconut - 4-5 tbs
Curry Leaves - few
Mustard Seeds &
Urad shal - 1tsp
Salt

Method

Take a deep pan or a kadai and cook the plantain with skin in enough water without the lid. Cook until the skin becomes blackish green. Peel the skin and grate the plantain. Mix the grated Plantain with coconut and salt and keep it aside. Take a tbs of oil in a skillet. Tamper the mustard seeds , add green Chilies, onions and curry leaves. Saute the onion till it become golden brown and add the grated plantain. Give a nice stir for a minute or two and switch of the flame. It becomes dry if you cook for a long time.


Serve with rice-Pulikozhambu (spicy tamarind Gravy) combo.


Notes: Use small onions instead of big to get a nice flavor.

Friday, April 4, 2008

Ennai Kathirikai (Baby Eggplant Fry)


Ennai Kathrikai usually refers to the stuffed eggplants in gravy. But my mom always makes the stuffed eggplants minus the gravy. The stuffing is a no brainer, it's either chili powder or sambar powder stuffing. Last week, I made ennai kathirikai when I called my friends for dinner. My friend who is a good cook liked it so much and she asked me for the recipe. I was surprised to know that she never cooked eggplant that way. It's very easy to make. Choose baby eggplants of possibly same size to make this dish, as they cook evenly.

Ingredients

Baby Eggplants - 10 to 12
Chilli Powder - 3 tbs
Turmeric - 1/4 tsp
Salt - 1 tbs

Method:

Make a paste of chili powder, turmeric and salt with little water. Lay the eggplant sideways on the cutting board and make a criss-cross cut starting from the bottom of the eggplant towards the cap. Make sure the slit doesn't split the eggplant into pieces. Take a bread knife and stuff the paste into the eggplant by sliding through the slits.


Take oil in a wide pan (use oil liberally). Place the eggplants in the pan and let it cook in a slow flame. After 5-7 minutes, flip them to the other side and cook. Handle them gently, otherwise the cooked eggplants fall apart. Cook in an open pan to get the roasted texture. Take the eggplants one by one with a spatula and arrange them in a plate.


Cook's Notes.

Patience is the key to this dish. Eggplants have to be roasted in a slow flame.
I like to leave the stem and cap on the eggplant. It helps in two ways. It holds the eggplant without falling apart and to gobble it holding the stem.

Monday, March 17, 2008

Achari Aloo (Aloo in Pickle Masala)


Last saturday we went to Chinese Restaurant P.F Chang's. We went with
great expectations but the food was just o.k. I would not recommend this
when you go with kids and elder people as the wait time is toooooo long.
We had to wait for 2 hrs.

Wondering how achari aloo and P.F Chang related?. Just to pass the waiting
time, we entered the MARKET FAIR Shopping Mall and passed time in B&N
Booksellers housed inside the complex. When I was browsing through few
cookbooks there, one cookbook caught my eyes named "The Bollywood Cookbook"
by Bulbul Malkani. The book is about the favorite food recipes of Bollywood
Stars. It has the recipe of Mouth watering Achari Aloo which is Bachan's
favorite. I decided to make it on Sunday. I couldn't remember the full
Ingredients but I know for sure it has aloo and pickle masala.


Ingredients

Potatoes - 4 Peeled and Cubed
Onion - 1 chopped
Mango
Pickle Masala - 3 tsp
Cumin Seeds - 1 tsp
Mustard Seeds - 1 tsp
Turmeric - 1/4 tsp
Red Chillies - 3 Broken
Home Made - 4 tbs
Yogurt

Method.

Heat oil in a pan. Toss in Cumin seeds and stir it quickly for a second and then add Mustard seeds to the pan. Once the Mustard seeds begins to pop, add broken red chillies,chopped onions and sauté till the onions become tender. Add the potatoes,turmeric,salt to the pan. Cover the pan with a lid and cook till the potatoes are cooked. Add the Pickle masala and coat the masala nicely on to the potatoes. Finally add the yogurt and cook for a minute or two. Garnish with Corriander leaves.


Serve with Roti or Rice.

Friday, October 19, 2007

Plantain Fry


Ingredients
Plantain -2
Coconut -2 tbs
Roasted Channa Dal- 1 tbs
Green Chilli- 4
Red Chilli - 1
Green Chilli- 2
Curry Leaves- few sprigs
Garlic Cloves -2
Salt
For seasoning :
Mustard Seeds
red Chilli -1
Curry leaves

Method
Peel the skin off the the Plantain and cut them into small cubes and parboil them. Grind together coconut,cumin seeds,Dhal,Chillies and curry leaves
to a coarse paste. Coat the plantain well with the paste. Keep oil in a pan and tamper the mustard seeds. Add broken red chillies, curry leaves and add the
coated plantains to the pan and fry them till golden brown.

Thursday, April 19, 2007

Chembu Roast(Arvi,Taro)


Chembu or Cheppankizhangu(Taro) is a root vegetable which is widely grown in Tamilnadu and neibouring state Kerala. We usually make chembu roast or use it in Morkuzhambu. This tuber has a gluey texture once boiled. It's a very good Source of Fiber.
I prefer always chembu roast . Most of it will be gone to the stomach even before it hits the dining table.
Ingredients
Chembu(arvi)
Chilli Powder
TurmericSalt
Method:
Pressure Cook the chembu with the skin. Peel the chembu and cut it into small rounds. Then Sprinkle Chilli powder,Turmeric and salt on the chembu rounds and mix it nicely to get the spice onto all the pieces. Heat the Kadai with oil and fry the Chembu pieces till it turns into golden Brown.
Serve hot with Rice and simple daal.

Kosuru : Taro root is used in "POI" which is the staple food of the Hawaiian . They pound the TARO root and add water to make desired consistency. They call it as one finger,two finger and three finger POI. More the water, more the number of fingers needed to take the "POI". Sounds Interesting. They even allow the POI to sit for 2 to 3 days to get a sour taste.